📄 Introduction
Tired of juggling endless spreadsheets and losing track of student records? What if you could manage all your students with a few clicks — in a sleek desktop app built with Rust for speed, safety, and a smooth GUI experience?
In this Level 1 tutorial, we’ll create a Teacher Assistant app with a beautiful GUI using Rust and egui, letting you add, update, delete, and view student records stored in CSV files. No more messy consoles, no more manual updates — everything is interactive, scrollable, and beginner-friendly.
Here’s what makes this project exciting:
- ✅ GUI-based interface — intuitive and visually clean.
- ✅ Full CRUD support — manage student records effortlessly.
- ✅ Readable, scrollable tables — neat columns for quick reference.
- ✅ Interactive dashboard — panel buttons make navigation a breeze.
By the end of this tutorial, you’ll have a fully functional Level 1 Teacher Assistant app, ready to expand in future levels with attendance, grades, and reports.
Before we start coding, let’s briefly review the key Rust and GUI concepts you’ll learn in this project.
🔖 Key Concepts in This App
This tutorial will guide you through important aspects of Rust GUI programming, including:
- Panel implementations — how Add, Update, Delete, and View panels are structured using impl blocks
- State management — switching between panels based on user interactions
- Storing data in CSV files — simple, lightweight persistent storage
- Table display — using TableBuilder and columns for aligned, scrollable views
- Interactive elements — buttons, input fields, forms, and layout with egui
With this roadmap, you’re ready to build an efficient and enjoyable student management tool. Let’s begin by exploring the login screen and dashboard layout, and then dive into how each panel is crafted using Rust and egui.
📌 Explore the App in Action
The code snippets in each section are simplified to highlight the core logic behind each panel. The complete, ready-to-run source code is available at the end of this post for you to download and experiment with.
🔐 Login panel
For this Level 1 demo, the login is kept simple with a placeholder admin account. Users can enter the username “admin” and password “1234” to access the dashboard. This basic authentication setup demonstrates how panel navigation works in a Rust GUI environment.
Once the credentials are validated, the app seamlessly transitions from the login screen to the main dashboard, where you can manage student records through Add, Update, Delete, and View panels.
if ui.add(egui::Button::new(egui::RichText::new("Login").size(15.0).strong().color(egui::Color32::DARK_BLUE),).min_size(egui::Vec2 { x: (50.0), y: (30.0) })).clicked() {
   if self.username == "admin" && self.password == "1234" {
      self.logged_in = true;
      self.login_error = None;
   } else {
      self.login_error = Some("❌ Invalid username or password".to_string());
   }
}
Explanation:
- Button Creation
ui.add(egui::Button::new(...))creates a login button with custom styling.RichTextmakes the text bold, larger, and colored dark blue.min_sizeensures consistent button dimensions.
- Click Handling
.clicked()checks if the button is pressed.
- Credential Validation
- The entered username and password are compared with “admin” and “1234”.
- If valid,
self.logged_inis set to true, switching to the Dashboard panel. - If invalid,
self.login_errorshows an error message for the user.
Screenshot: Login panel in action, including fields for username, password, and the login button.
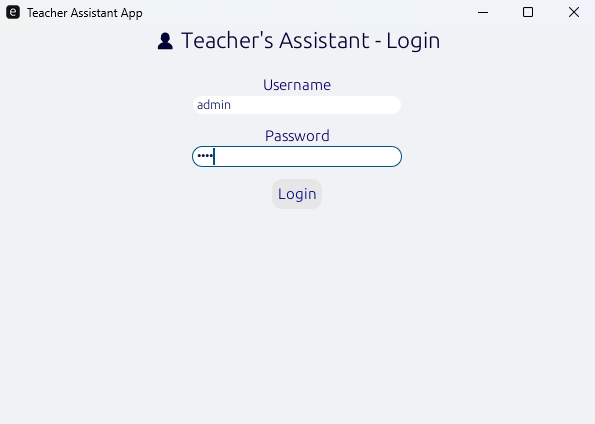
Click the image to view full size
📊 Dashboard Panel – Navigate Student Management
After logging in, you’ll arrive at the Dashboard panel, where all student management features are accessible with a click. The dashboard presents buttons for Add, Update, Delete, and View student records, offering smooth and intuitive navigation.
DashboardState::Main => {
    if ui.add(egui::Button::new(egui::RichText::new("Add a Student").size(15.0).strong().color(egui::Color32::DARK_BLUE),).min_size(egui::Vec2 { x: (200.0), y: (50.0) })).clicked(){
        self.state = DashboardState::AddStudent;
    }
    ui.add_space(20.0);
    if ui.add(egui::Button::new(egui::RichText::new("Update Student Details").size(15.0).strong().color(egui::Color32::DARK_BLUE),).min_size(egui::Vec2 { x: (200.0), y: (50.0) })).clicked() {
        self.state = DashboardState::UpdateStudent;
    }
    ui.add_space(20.0);
    if ui.add(egui::Button::new(egui::RichText::new("Delete Student").size(15.0).strong().color(egui::Color32::DARK_BLUE),).min_size(egui::Vec2 { x: (200.0), y: (50.0) })).clicked(){
        self.state = DashboardState::DeleteStudent;
    }
    ui.add_space(20.0);
    if ui.add(egui::Button::new(egui::RichText::new("View Student Details").size(15.0).strong().color(egui::Color32::DARK_BLUE),).min_size(egui::Vec2 { x: (200.0), y: (50.0) })).clicked(){
    self.state = DashboardState::ViewStudent;
    }
}
Explanation:
- Button Styling
- Each button uses
RichTextto make the text bold, slightly larger, and dark blue. min_sizeensures all buttons have a consistent width and height for a neat appearance.
- Each button uses
- Navigation Logic
- Clicking a button updates the app’s state (self.state) to the relevant panel, such as Add or Update.
ui.add_space(20.0)adds vertical spacing between buttons, keeping the layout clean and easy to read.
Screenshot: Dashboard panel showcasing buttons to add, update, delete, and view student records.
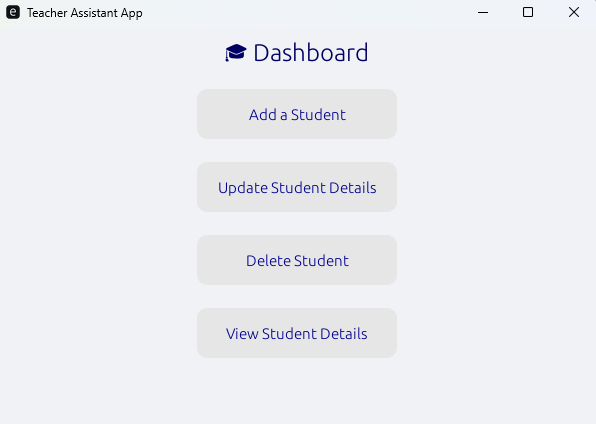
Click the image to view full size
➕ Add a New Student
With the dashboard ready, teachers can easily add new students by filling in essential details like name, class, roll number, and section. The Add Student panel ensures that all fields are properly completed before the record is saved.
if ui.add(egui::Button::new(egui::RichText::new("Add Student").size(15.0).strong().color         (egui::Color32::DARK_BLUE),).min_size(egui::Vec2 { x: (200.0), y: (50.0) })).clicked() {
   if self.new_roll_no.trim().is_empty()
     || self.new_name.trim().is_empty()
     || self.new_class.trim().is_empty()
     || self.new_section.trim().is_empty()
   {
     self.add_error = Some("All fields are required.".to_string());
     self.add_success = None;
   } else {
     self.students.push(Student {
     roll_no: self.new_roll_no.trim().to_string(),
     name: self.new_name.trim().to_string(),
     class_name: self.new_class.trim().to_string(),
     section: self.new_section.trim().to_string(),
   });
   self.new_roll_no.clear();
   self.new_name.clear();
   self.new_class.clear();
   self.new_section.clear();
   self.add_error = None;
   self.add_success = Some("Student added successfully!".to_string());
   }
}
Explanation:
- Form Validation
- The form checks that none of the fields are empty before saving the student. If any field is missing, an error message is displayed.
- Saving Data
- When all fields are valid, a new Student struct is created and appended to the list of students.
- Resetting the Form
- After a successful entry, the input fields are cleared, and a success message is shown to confirm the action.
Screenshot: Add Student panel where users can input new student details.
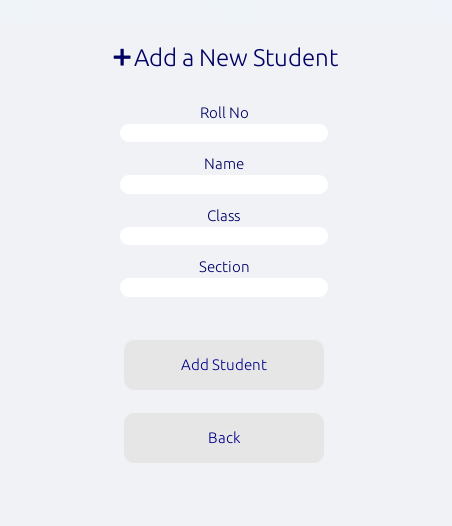
Click the image to view full size
📝 Update Student
This panel allows teachers to quickly edit existing student records — whether it’s correcting a spelling mistake or updating class information. The update only applies to the fields that have new input, so unchanged data remains intact.
if let Some(student) = self.students.iter_mut().find(|s| s.roll_no == self.update_roll_no.trim()) {
   if !self.update_name.trim().is_empty() {
      student.name = self.update_name.trim().to_string();
   }
  if !self.update_class.trim().is_empty() {
     student.class_name = self.update_class.trim().to_string();
   }
  if !self.update_section.trim().is_empty() {
     student.section = self.update_section.trim().to_string();
   }
  self.update_name.clear();
  self.update_class.clear();
  self.update_section.clear();
  self.update_roll_no.clear();

  self.update_error = None;
  self.update_success = Some("Student updated successfully!".to_string());
}
Explanation:
- Finding the Student
- The code searches for a student with a matching roll number using .find().
- Selective Updates
- Only fields with new input are updated, ensuring that existing data isn’t overwritten unnecessarily.
- Clearing Inputs
- After the update, all form fields are cleared to prepare for the next operation.
- User Feedback
- A success message confirms the update, making the app’s behavior transparent and reassuring.
Screenshot: Update Student panel where teachers can edit existing student information.
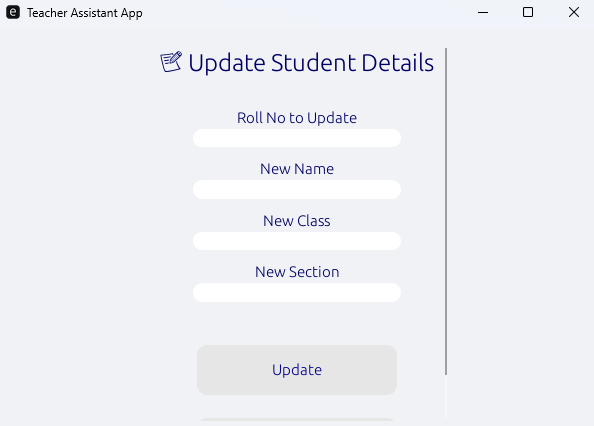
Click the image to view full size
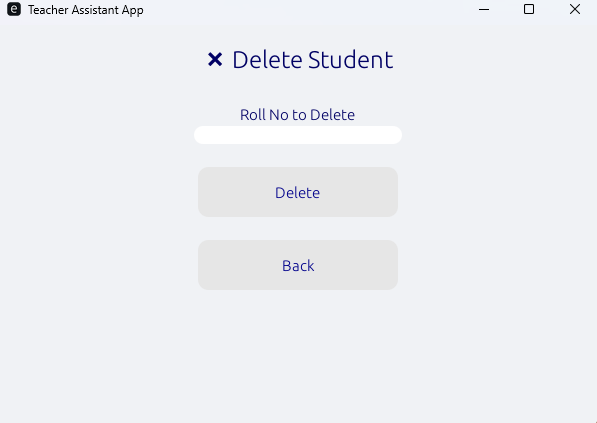
🗑️ Delete Student
When student records are no longer needed — such as for graduated or transferred students — this panel helps teachers delete them easily by entering the roll number.
if ui.add(egui::Button::new(egui::RichText::new("Delete").size(15.0).strong().color(egui::Color32::DARK_BLUE),).min_size(egui::Vec2 { x: (200.0), y: (50.0) })).clicked(){
  let initial_len = self.students.len();
  self.students.retain(|s| s.roll_no != self.delete_roll_no.trim());
  if self.students.len() < initial_len {
    self.delete_success = Some("Student deleted successfully.".to_string());
  } else {
    self.delete_success = Some("No student found with this Roll No.".to_string());
  }
    self.delete_roll_no.clear();
}
Explanation:
- Deleting by Roll Number
- The app searches for the student and removes the record if the roll number matches.
- Feedback Messages
- If a student is found and deleted, a success message is shown.
- If no match is found, a warning message informs the user.
- Improved Usability
- The input field is cleared after each operation, keeping the interface ready for the next action.
Screenshot: Delete Student panel where teachers can remove outdated student records.
Click the image to view full size
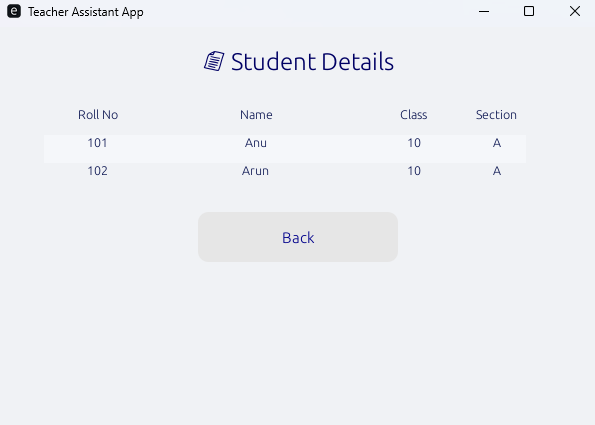
📋 View Students
The final panel lets teachers view all student records at once. The information is neatly organized into a structured table, making it easy to reference details like roll number, name, class, and section without endless scrolling.
ui.label(
 egui::RichText::new("📃Student Details")
  .strong()
  .size(24.0),
 );
ui.add_space(30.0);

if self.students.is_empty() {
  ui.label(
  egui::RichText::new("No students to display.")
    .italics()
    .color(egui::Color32::GRAY),
   );
}
Explanation:
- Clean Header
- A bold and large label is used to clearly indicate the section for student details.
- Handling Empty States
- If no student records exist, a helpful message in italics informs the user gracefully.
After adding student details, the panel uses TableBuilder from egui::extras to display the records in a scrollable and neatly aligned table format. This ensures that even a long list of students can be easily browsed.
Screenshot: View Students panel displaying all student records with clean layout and clear headings.
Click the image to view full size
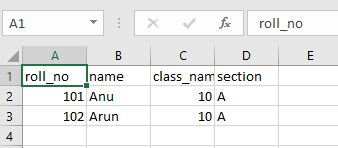
📂 Saving Student Data to a CSV File
Once you’ve built the Add Student panel, it’s essential to ensure that the data persists — meaning it’s saved even after closing the app. For this Level 1 implementation, we use CSV files, a simple, lightweight, and human-readable format that’s perfect for storing structured data without the complexity of a full database.
This approach keeps the app beginner-friendly while providing reliable, permanent storage.
fn save_students_to_csv(path: &str, students: &Vec<Student>) -> Result<(), Box<dyn std::error::Error>> {
    let file = File::create(path)?;
    let mut wtr = Writer::from_writer(file);

    // Write header row
    wtr.write_record(&["roll_no", "name", "class_name", "section"])?;

    // Write each student record
    for student in students {
        wtr.write_record(&[
            &student.roll_no,
            &student.name,
            &student.class_name,
            &student.section,
        ])?;
    }
    wtr.flush()?;
    Ok(())
}
Explanation:
- File Creation
- File::create is used to create or overwrite the CSV file at the specified path.
- Writing Headers
- The first row contains headers like roll number, name, class, and section.
- Saving Student Records
- Each student is written as a separate row, with fields aligned in the correct order.
- Ensuring Data is Written
- flush() makes sure that all data is saved and available for the next time the app runs.
Screenshot: The students.csv file storing student records in structured format.
Click the image to view full size
Full Working Code – Teacher’s Assistant App (Level 1)
You’ve explored all the important pieces of this app through code snippets and explanations. Now, here’s the complete source code, ready for you to copy, compile, and run!
Use this as your starting point for personal projects or as a foundation for more advanced features in Level 2.
Click here to view the full code
Feel free to experiment — change layouts, add new fields, or tweak the UI to make it your own!
🎯 Conclusion
Congratulations!🎉 You’ve built a fully functional Teacher Assistant app in Rust with a polished GUI, an interactive dashboard, and CSV-based student management.
In this Level 1 tutorial, you’ve learned how to:
✅ Implement panels using impl blocks ✅ Manage state transitions between different views ✅ Store data persistently in CSV files ✅ Display data with scrollable, aligned tables for easy navigation
This app is a practical, beginner-friendly introduction to building GUI applications in Rust — simple, structured, and ready for further enhancements.
🎬 Demo Video: Teacher’s Assistant App
Demo of Level 1 Teacher Assistant app – adding, updating, deleting, and viewing students.
🔜 Next on 🚀Techn0tz
In Level 2, we’ll build this further by adding attendance tracking, grades management, and student reports — transforming this basic app into a powerful tool that’s closer to real-world use.
Stay tuned!!, and get ready to level up your Rust GUI development!