📄 Introduction
Thinking of learning Rust? Start here — no prior experience needed.
Rust is a modern systems programming language built for performance, reliability, and memory safety — all without needing a garbage collector. Whether you’re starting from scratch or switching from Python or Go, this guide walks you through a clean Rust setup on Windows, using Visual Studio Code and Cargo, Rust’s powerful package manager.
Rust is already powering web servers, game engines, embedded systems, and more — anywhere speed and safety matter.
In this beginner-friendly post, you’ll learn how to:
- Install Rust using rustup on Windows
- Set up your Rust environment with VS Code
- Create and run your first Rust project
- Compare Rust to Python and Go through simple tasks
You’ll also see real beginner errors (with screenshots!) — so you won’t get stuck where most tutorials leave off.
This post kicks off the Techn0tz Rust Series, where we’ll explore powerful concepts like ownership, immutability, and pattern matching — but first, let’s set up Rust the right way.
✍️ Ready to write your first Rust program — without the confusion? Let’s go.
💭 Why Rust Stands Out?
Rust isn’t just another language — it offers the safety and control of C/C++, with the readability and tooling of modern languages. It’s designed for developers who need low-level power without crashes, data races, or undefined behavior.
Here’s how Rust compares to Python and Go — two popular modern languages — in a few key areas:
| Feature | Rust | Python | Go |
|---|---|---|---|
| Memory | Ownership-based (manual) | Garbage collected | Garbage collected |
| Speed | Compiled, native performance | Interpreted (slower) | Compiled, near-native |
| Error Handling | Result / Option types |
Exceptions (try/except) |
Error returns |
| Null Safety | No nulls (Option<T>) |
None values allowed |
Uses nil |
| Concurrency | Safe, fearless concurrency | Threads, GIL restricted | Lightweight goroutines |
Rust helps you build blazing-fast apps — without needing a garbage collector.
You get fine-grained control, memory safety, and fearless concurrency, all compiled into lightning-fast binaries.
📑 Rust vs Python vs Go: Everyday Code, Side by Side
To help you quickly understand the feel of Rust, here’s how everyday coding tasks look in comparison with Python and Go:
| Task | Rust | Python | Go |
|---|---|---|---|
| Print output | println!("Hello"); |
print("Hello") |
fmt.Println("Hello") |
| Declare variable | let x = 5; |
x = 5 |
var x = 5 or x := 5 |
| Mutable variable | let mut x = 10; |
x = 10 variables are mutable by default |
var x = 10 (all mutable) |
| Add two numbers | let sum = a + b; |
sum = a + b |
sum := a + b |
| Read input | io::stdin().read_line(&mut input) |
input() |
fmt.Scanln() |
| Convert string to int | input.trim().parse::<i32>() |
int(input()) |
strconv.Atoi(input) |
| Define a function | fn add(a: i32, b: i32) -> i32 { a + b } |
def add(a, b): return a + b |
func add(a int, b int) int { return a + b } |
Rust doesn’t make assumptions. Every step — from reading input to parsing types — is explicit and safe.
It might feel strict at first, but it trains you to write precise, reliable code — in any language.
🛠️ Installing Rust and C++ Prerequisites (Step-by-Step)
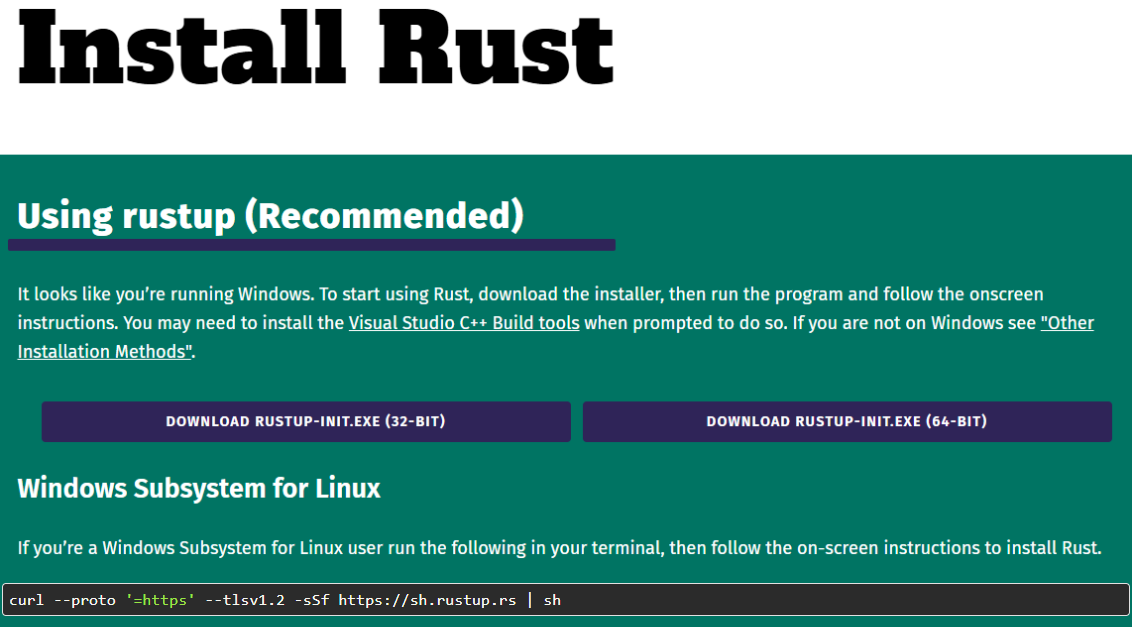
Step 1: Download Rustup Installer
Rust uses rustup, the official installer and version manager for Rust.
- Visit https://rustup.rs and download the Windows installer.
Screenshot : Rust official installer page with options for different platforms.
Click the image to view full size
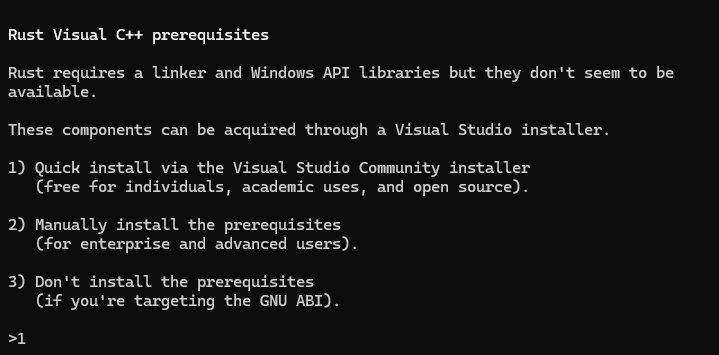
Step 2: Start rustup-init.exe and Handle Missing C++ Tools
When you run rustup-init.exe, a terminal window opens and begins setup.
- If your system is missing the required C++ build tools, rustup will detect this and suggest installing them via Visual Studio.
Tip: Don’t worry — rustup automates this part for you.
Screenshot : rustup detects missing Visual C++ build tools and offers installation options.
Click the image to view full size
Choose Option 1 to install prerequisites via Visual Studio Installer.
- rustup then downloads the installer and begins setup automatically:
Screenshot : rustup starts downloading Visual Studio Installer and continues once setup is complete.

Click the image to view full size
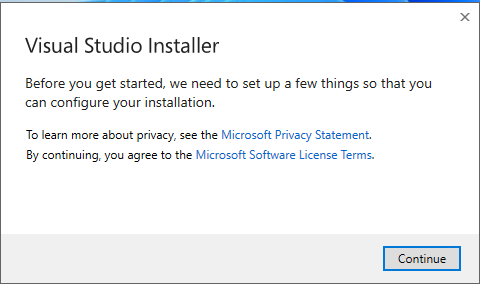
Step 3: Visual Studio Installer Starts
Once downloaded, you’ll see the Installer launches with a privacy prompt:
Screenshot : First screen of the Visual Studio Installer — click “Continue” to proceed.
Click the image to view full size
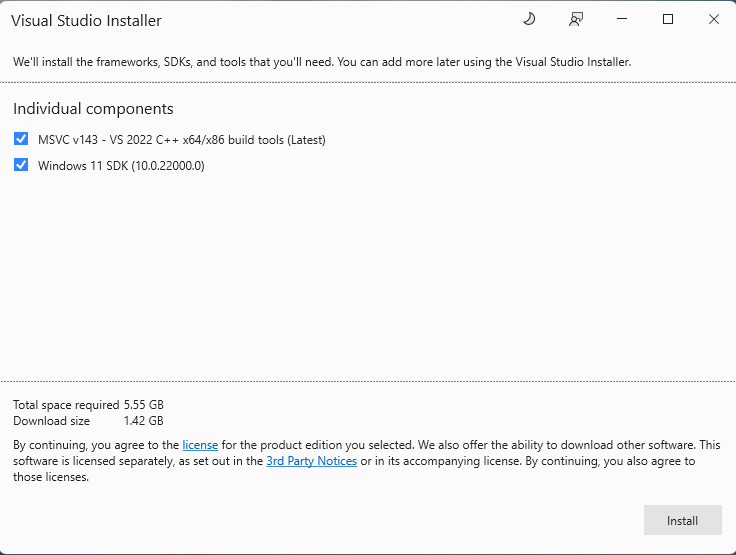
Step 4: Select C++ Tools and Start Installation:
Under the Individual components tab, select the following:
- MSVC v143 – Latest C++ Build Tools
- Windows 11 SDK (or the latest available version) Then click Install.
Screenshot : Selecting required components for Rust development in Visual Studio Installer
Click the image to view full size
Screenshot : Visual Studio Installer begins installing selected components
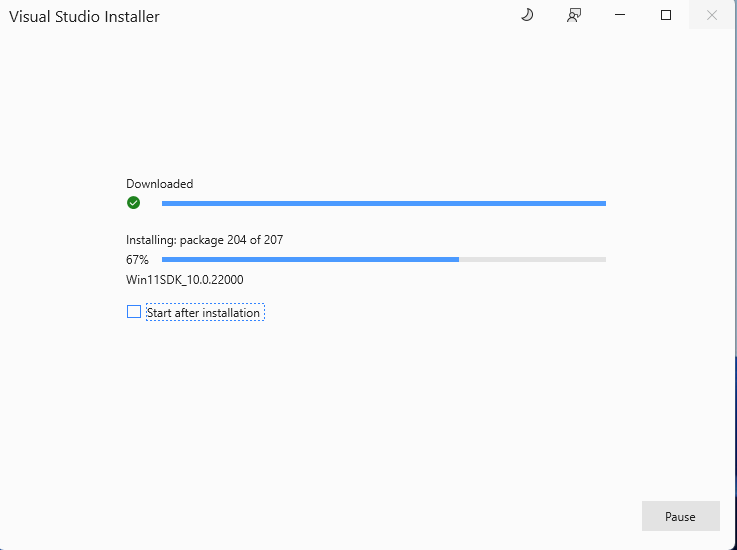
Click the image to view full size
Step 5: Continue and Complete Rust Installation
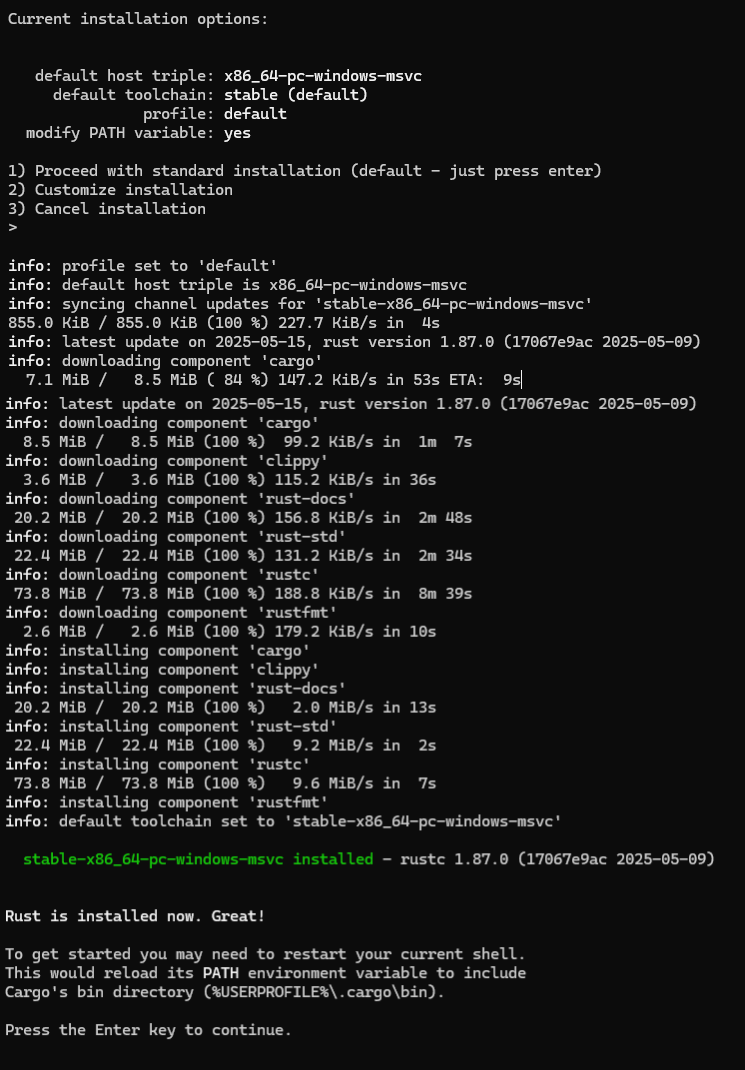
After Visual Studio finishes installing the required components, rustup will automatically resume and complete the Rust setup.
- The Rust compiler rustc
- The Cargo package manager
- The default Rust toolchain
Screenshot : rustup resumes and installs Rust components after Visual Studio setup completes
Click the image to view full size
Just press Enter to accept the default installation settings.
Step 6: Verify Installation
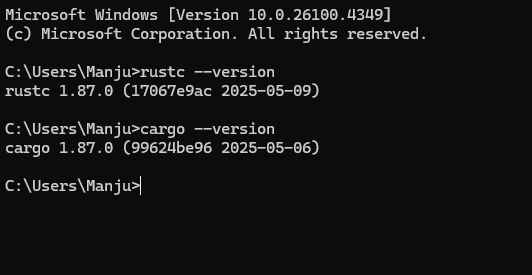
To confirm Rust and Cargo are installed correctly, open a terminal and run:
rustc --versioncargo --version
You should see version numbers printed for both — that means you’re ready to start coding in Rust!
Screenshot : Verifying Rust and Cargo installations using version check in terminal.
Click the image to view full size
📋 Create and Run Your First Rust Project
Now that Rust is installed, let’s create your very first Rust project using Cargo, Rust’s official build system and package manager.
We’ll do this step-by-step inside Visual Studio Code (VS Code).
Step 1: Open Your Project Folder in VS Code
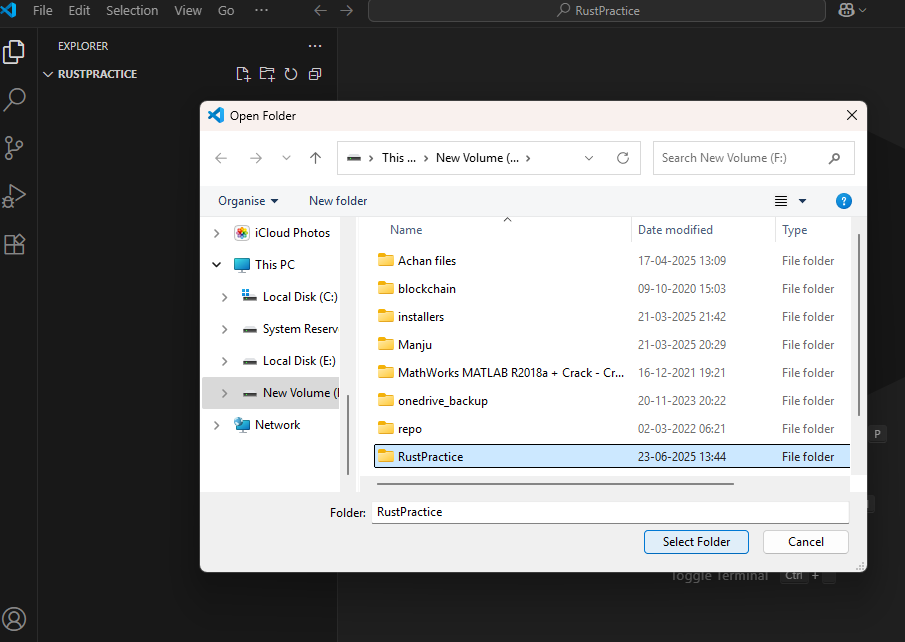
- Create a folder where you’ll store all your Rust projects — for example: F:\RustPractice or Documents\RustProjects.
- Open this folder in Visual Studio Code using the File → Open Folder… option.
Screenshot : Opening a dedicated Rust practice folder in VS Code
Click the image to view full size
Step 2: Install the Rust Analyzer Extension
Rust Analyzer gives you auto-completion, error hints, and even inline documentation as you type.
- After installing, reload VS Code if prompted.
Screenshot : Install the Rust Analyzer extension in VS Code for enhanced Rust development support
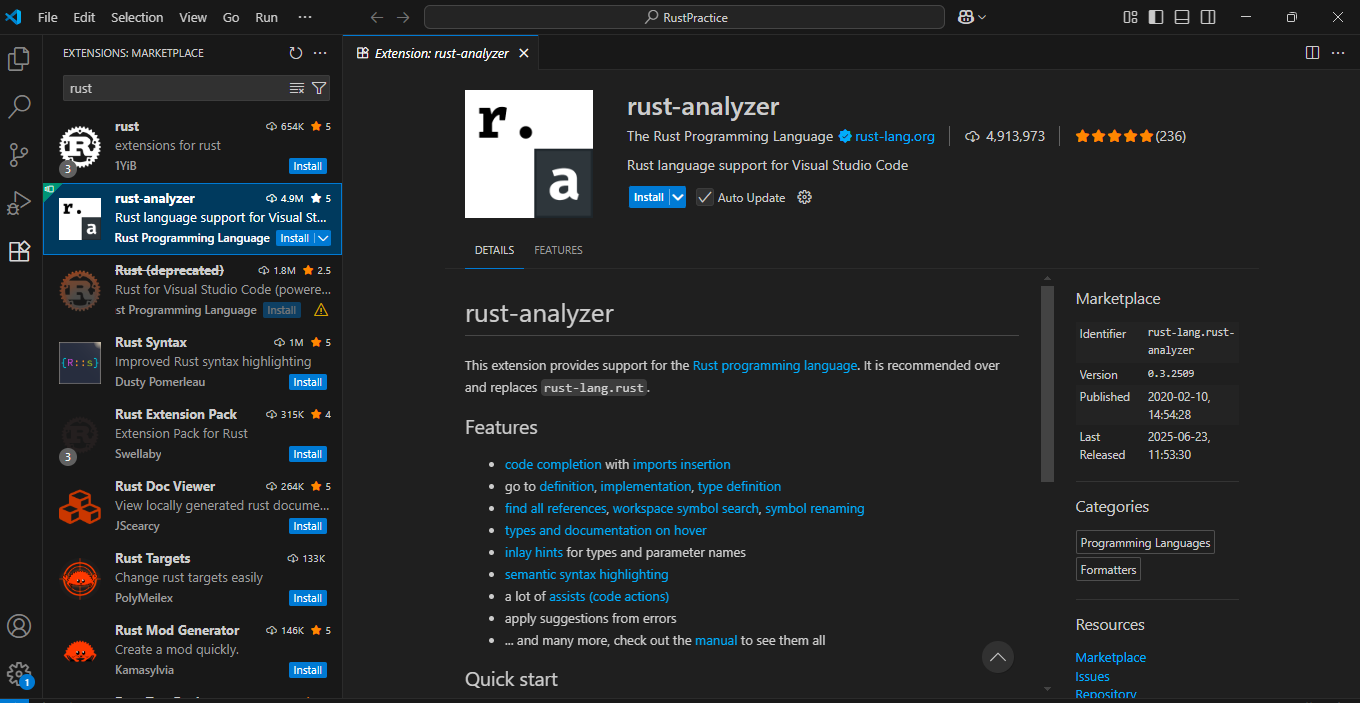
Click the image to view full size
Step 3: Create a New Project Using Cargo
Open the terminal in VS Code and run the following command:
cargo new hello_rust
This command:
- Creates a new folder called hello_rust
- Initializes it as a Cargo project
- Adds a sample main.rs with a “Hello, world!” message
Screenshot : Creating a new Rust project using cargo new hello_rust

Click the image to view full size
Now open the newly created hello_rust folder in VS Code.
Step 4: Explore the Project Structure
Here’s what the generated folder contains:
- Cargo.toml → Project metadata and dependencies
- src/main.rs → Your starting point (like main() in C++)
Note: Cargo.toml is similar to package.json (in Node.js) or requirements.txt (in Python) — it manages dependencies, metadata, and more.
Screenshot : main.rs file opened in VS Code with the default Hello World program
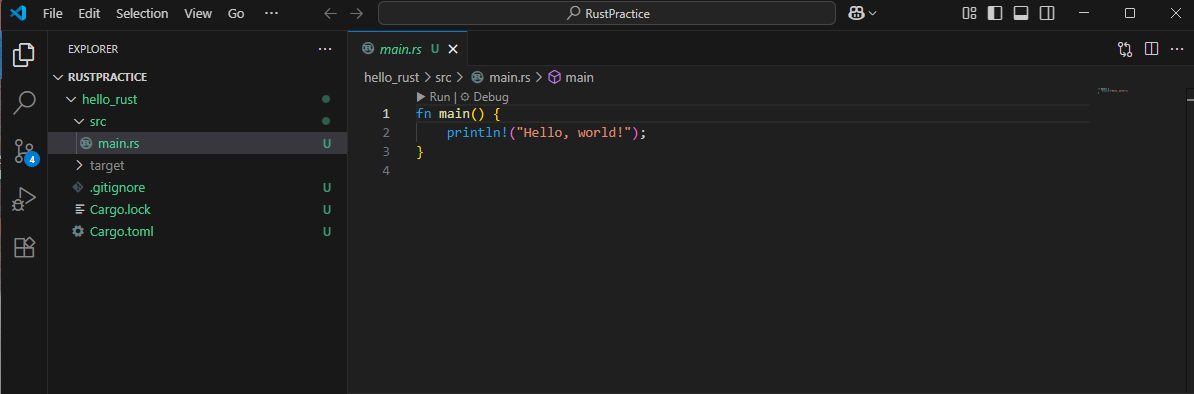
Click the image to view full size
Step 5: Run Your Program
In the terminal, navigate to the project directory if you’re not already there:
cd hello_rust
cargo run
cargo run command:
- Compiles your code (cargo build)
- Executes the binary
- If nothing has changed, it skips recompilation
And finally:
If you see Hello, world! in your terminal — 🎉 congrats, you’ve officially run your first Rust program!
Screenshot : Running the default Rust program using cargo run in VS Code terminal
Click the image to view full size
⚠️ Beginner Pitfalls to Watch For
These are real errors I ran into while setting up Rust — and chances are, you might too. Here’s how to fix them quickly.
‘cargo’ is not recognized
Error :
cargo : The term 'cargo' is not recognized as the name of a cmdlet...
Fix : This usually happens right after installing Rust. Close and reopen VS Code or your terminal to apply the system PATH changes.
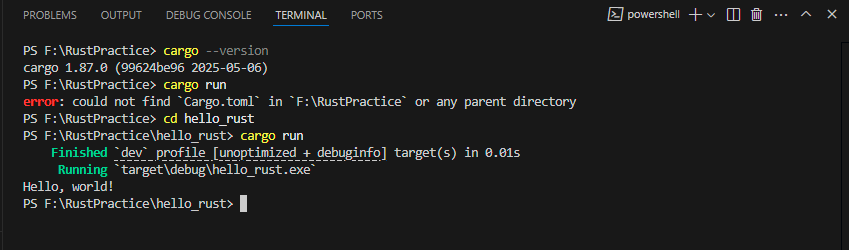
Running in the Wrong Folder
Error :
failed to find any projects in [F:\SomePath]
Fix : Make sure you’re inside a Rust project folder — where the Cargo.toml file exists.
Example : Navigate into the correct folder:
cd hello_rust
cargo run
Screenshot : Running the command inside the correct Rust project folder shows the expected output: Hello, world! (This is the same output as shown earlier.)
Click the image to view full size
VS Code Rust Plugin Doesn’t Detect Tools
If you opened VS Code before installing Rust, the Rust Analyzer extension might fail to detect the toolchain.
Fix: Just close and reopen VS Code — it will auto-detect Rust tools (rustc, cargo, etc.) the next time.
🎯 Conclusion — You’re Officially Set Up with Rust
You’ve taken your first real step into Rust programming — and it’s a solid one.
From installation quirks to that first successful cargo run, you’ve done more than just print “Hello, world!” — you’ve built a clean, professional Rust setup on Windows.
In this post, you:
- Set up Rust and all required C++ build tools
- Ran your first Rust program using Cargo
- Compared Rust to Python and Go for a smoother transition
- Learned how to avoid common beginner errors But this is just the beginning.
Ready to write real Rust code? Dive into Rust Basics on Techn0tz – Variables, Mutability & Data Types made simple— your setup is done, now let’s start coding!
Stay Tuned!