🔗 Missed Part-1 and Part-2?
👉 Checkout Jekyll Series: Part-1 and Part-2 to get familiar with installing Git, Ruby, Bundler, and Jekyll, and to learn how to build and preview a Jekyll site locally.
📃 Introduction
Welcome to Part 3 of the Jekyll Series on 🚀Techn0tz. In this post, you will learn how to make the Jekyll site you built and previewed locally in Part 2 live on the internet using GitHub Pages. GitHub Pages is a free and reliable platform for hosting static websites directly from your GitHub repository, making it an ideal choice for Jekyll sites.
By the end of this tutorial, you will know how to initialize a Git repository for your Jekyll site, connect it to a remote GitHub repository, and deploy your site with just a few commands. Whether you’re creating a personal blog or a project site, this guide will help you make your Jekyll site live and accessible to anyone online.
🎈Let’s get started!
🎯 Prerequisites
- Before we begin, ensure that you have:
- A Jekyll Site - The Default Jekyll site that you built and tested locally, as covered in Part 2 of this series.
- Git Installed - Git should be properly installed and configured on your system.
- A GitHub Account - An active GitHub account, to push your site to a repository.
📝 Steps for Deploying Your Site to GitHub Pages
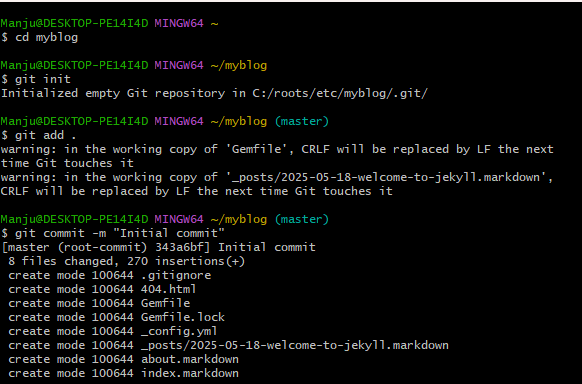
🌐 Step 1: Initializing a Git Repository
- Navigate to your Jekyll site folder (eg. cd Users ; cd myblog).
- Initialize a Git repository using
git init. - Add all the files using
git add .. -
Make the initial commit with
git commit -m message. - Screenshot - Git Bash terminal from init to commit.
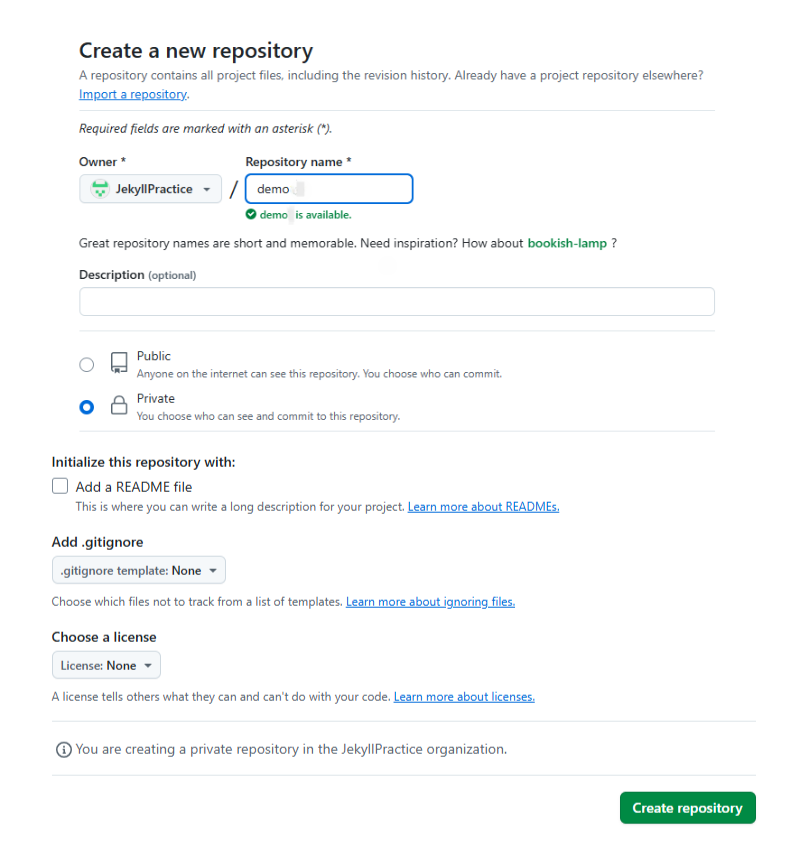
🌐 Step 2: Create a New Repository on GitHub
- Go to GitHub.com and log in.
- Click on the ➕”New Repository” button.
- Choose a repository name:
- For a User/Organization Site: your-username.github.io.
- For a Project Site: Any other name of your choice.
- Set the repository visibility to “Public” or “Private” as needed.
- Do not initialize with a README, .gitignore, or license.
-
Click “Create Repository”.
- Screenshot - GitHub New Repository creation page.
🌐 Step 3: Link Local Repository to GitHub
- Set the default branch to main using
git branch -M main. -
Add remote origin using the command
git remote add origin https://github.com/your-username/your-repo-name.git. - Screenshot - Creating a new GitHub repository for your Jekyll site.

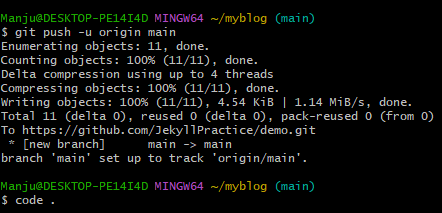
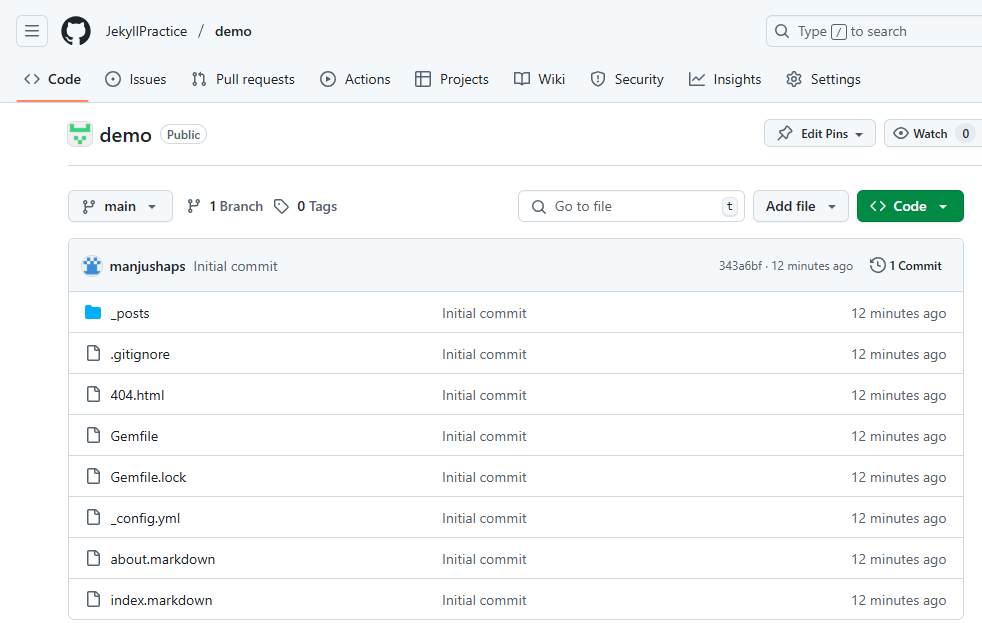
🌐 Step 4: Push Your Site to GitHub
-
Push the code to GitHub using
git push -u origin mainand open the Jekyll site folder in VS Code usingcode .(or your default text editor). -
Screenshot - Pushing Jekyll Site to GitHub.
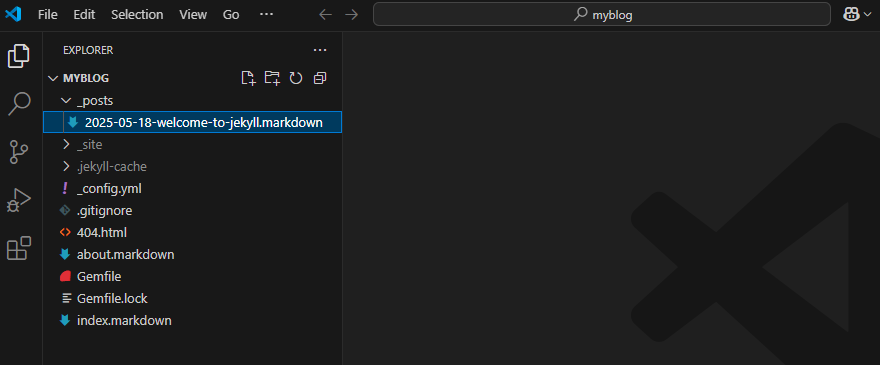
-
Screenshot - Jekyll site folders in VS Code.
-
Screenshot - Github repository showing the pushed site files.
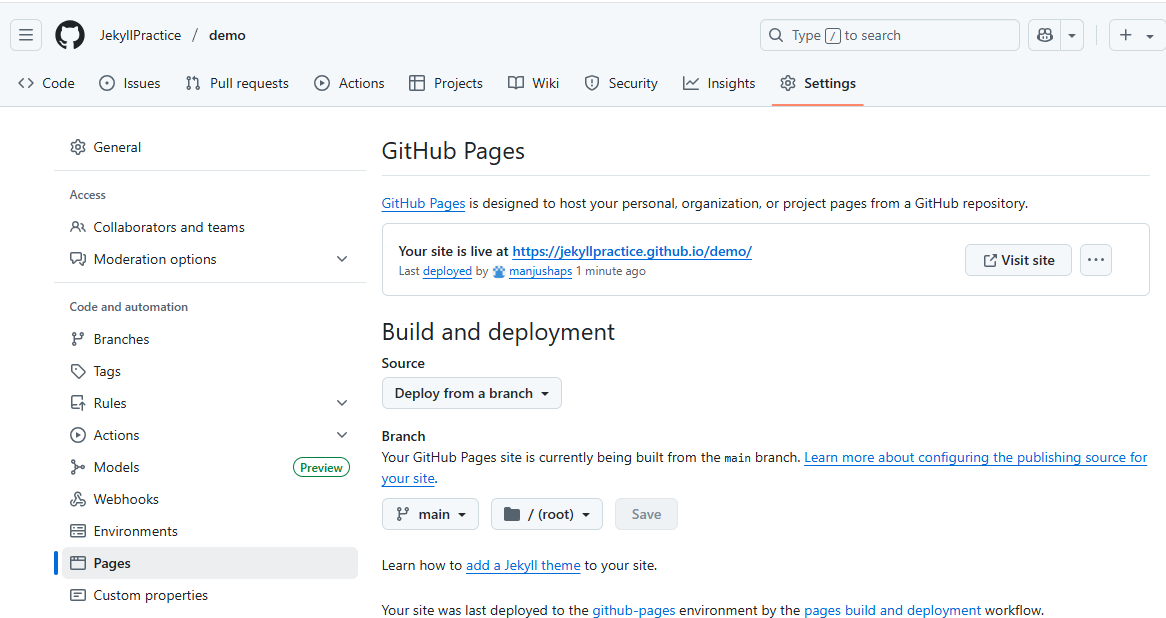
🌐 Step 5: Configure GitHub Pages
- Go to your GitHub repository settings.
- Scroll down to the “Pages” section.
- Set the Source branch (main or gh-pages) and the folder (root or docs).
-
Click “Save”.
- Screenshot - Repository configuration settings.

🌐 Step 6: Verify Your Site is Live
-
Once configured, GitHub will begin building your site. This may take a few minutes. When the process completes, refresh your browser to view your live site.
-
Screenshot - Browser showing the live Jekyll site URL.
📃 Conclusion
In this part, you learned how to take your locally built Jekyll site and successfully deploy it using GitHub Pages. You initialized a Git repository, pushed your code, and configured GitHub Pages — making your site publicly available. With this, your static site is now live on the internet.
💡 Technuggetz
Always preview your Jekyll site locally before pushing to GitHub to avoid any build errors.
🔜 Next on Techn0tz..
In the final part of this Jekyll series, we’ll walk through a complete live example — from creating a new Jekyll site, customizing it, writing blog posts, and deploying it to GitHub Pages with real content.
Stay tuned to Techn0tz!! for the final step in your Jekyll journey.