📃 Introduction
Welcome to Part 4 of the Jekyll Series on Techn0tz!!.
In the previous parts, we explored Git, GitHub, installing Jekyll on Windows, building and previewing a site locally, and pushing it to GitHub Pages. Now, it’s time to put that knowledge into practice by creating a real-world project — a fully functional blog named LiveBlog, powered by Jekyll and deployed using GitHub Pages.
This step-by-step guide will walk you through everything from creating the site to customizing content, previewing locally, using Git for version control, and deploying it live. By the end, you’ll have your own blog online — and a solid understanding of the full Jekyll workflow.
📄 Project Overview
Objective
To build a working static blog using Jekyll(with the Minima theme) and deploy it publicly using GitHub Pages. We will build and customize a new site called LiveBlog, track its changes using Git, and publish it to the web — for free.
Tools and Technologies
| Tool | Purpose |
|---|---|
| Jekyll | Static site generator |
| Minima Theme | Clean, minimal blog layout (default) |
| Git | Version control for tracking changes |
| GitHub | Hosting the blog via GitHub Pages |
| Bundler | Manages Ruby and Jekyll dependencies |
| VS Code | Code editor (optional but recommended) |
Tip: If you’re unfamiliar with the commands or setup steps used in this post (like
jekyll new,bundle install, orgit init), check out Jekyll Series: Part-1 and Part-2 for a detailed walkthrough
📝 Step-by-Step WorkFlow
🌐 Step 1: Setup Jekyll project with Git Integration
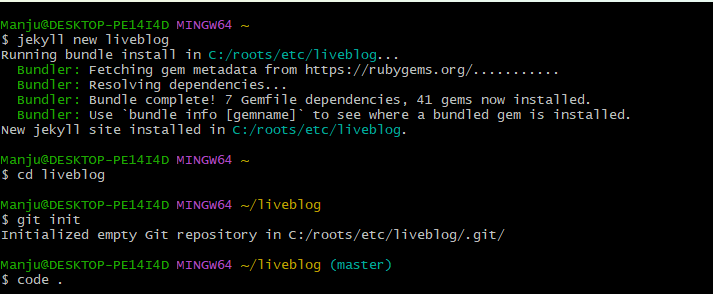
- Run the following commands to create and open a new Jekyll site:
jekyll new liveblog cd liveblog git init code . -
Screenshot - Git Bash Terminal after site creation and git init
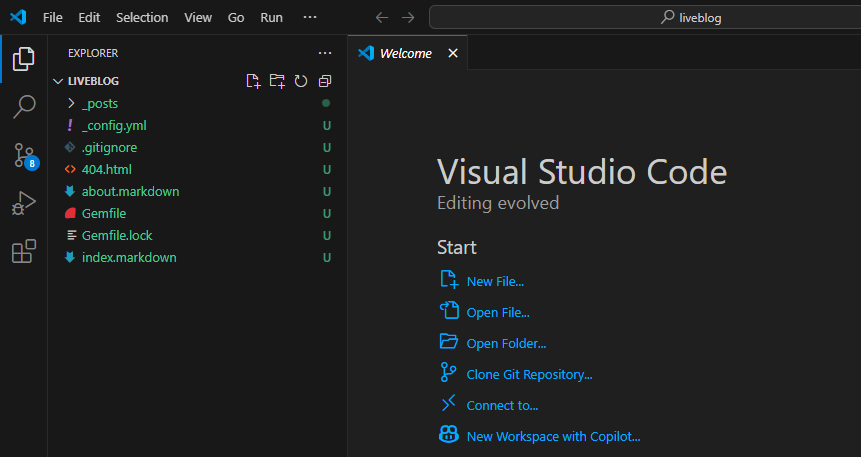
- Screenshot - Project opened in VS code
🌐 Step 2: Configure _config.yml
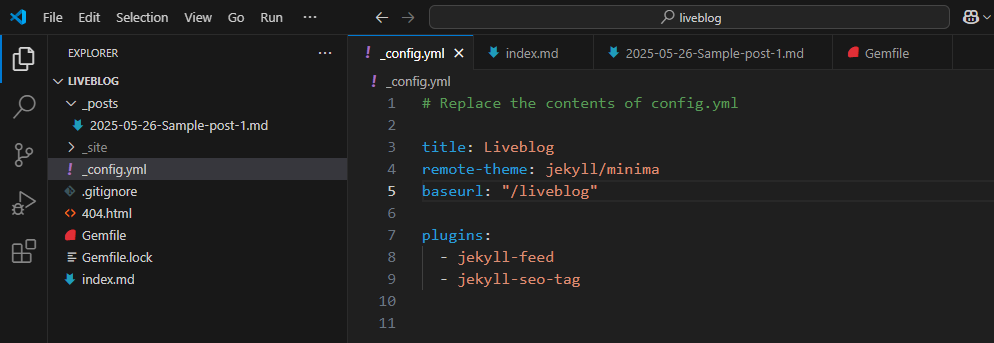
- Replace the existing contents of _config.yml file
title: Liveblog
remote-theme: jekyll/minima
baseurl: "/liveblog"
repository: yourusername/Liveblog (optional)
Note: The repository key helps GitHub Pages generate site metadata correctly.
- Screenshot - Update _config.yml
Click the image to view full size
🌐 Step 3: Customize index.md
- This file serves as your homepage. You can add a welcome message or list of recent posts.
- Rename the file as index.md
layout: default
title: Welcome
<h1>Welcome to Liveblog</h1>
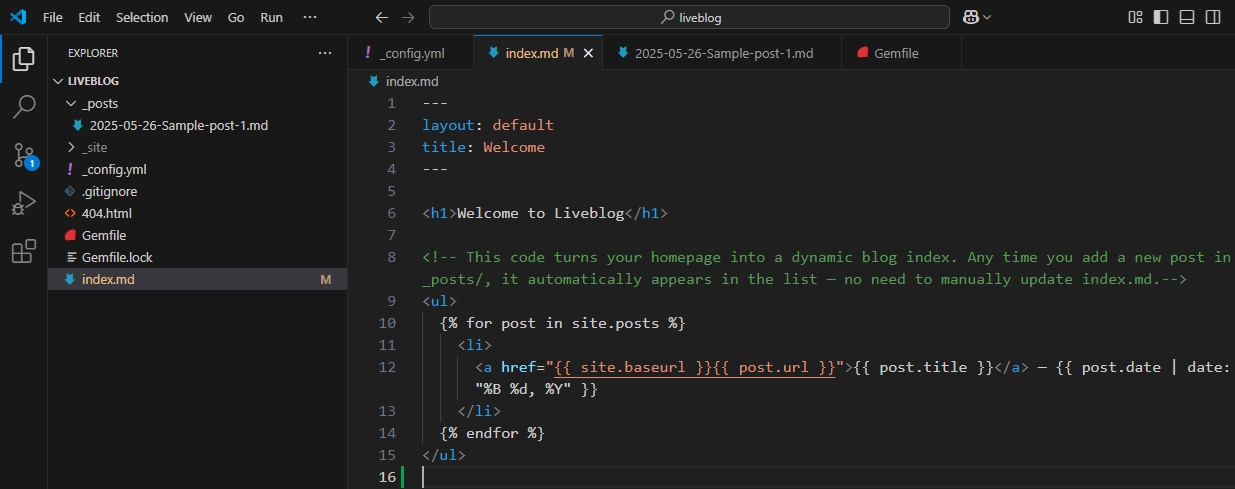
- The code given below turns your homepage into a dynamic blog index. Any time you add a new post in _posts/, it automatically appears in the list — no need to manually update index.md.
<ul>
  {% for post in site.posts %}
    <li>
      <a href="{{ site.baseurl }}{{ post.url }}">{{ post.title }}</a> — {{ post.date | date: "%B %d, %Y" }}
    </li>
  {% endfor %}
</ul>
- Screenshot - Customized index.md
Click the image to view full size
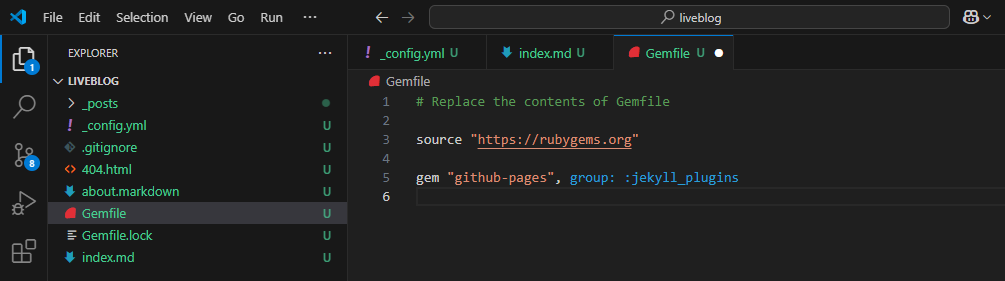
🌐 Step 4: Update GemFile
- In the GemFile, replace or modify contents as shown in the screenshot.
- Screenshot - Updated GemFile
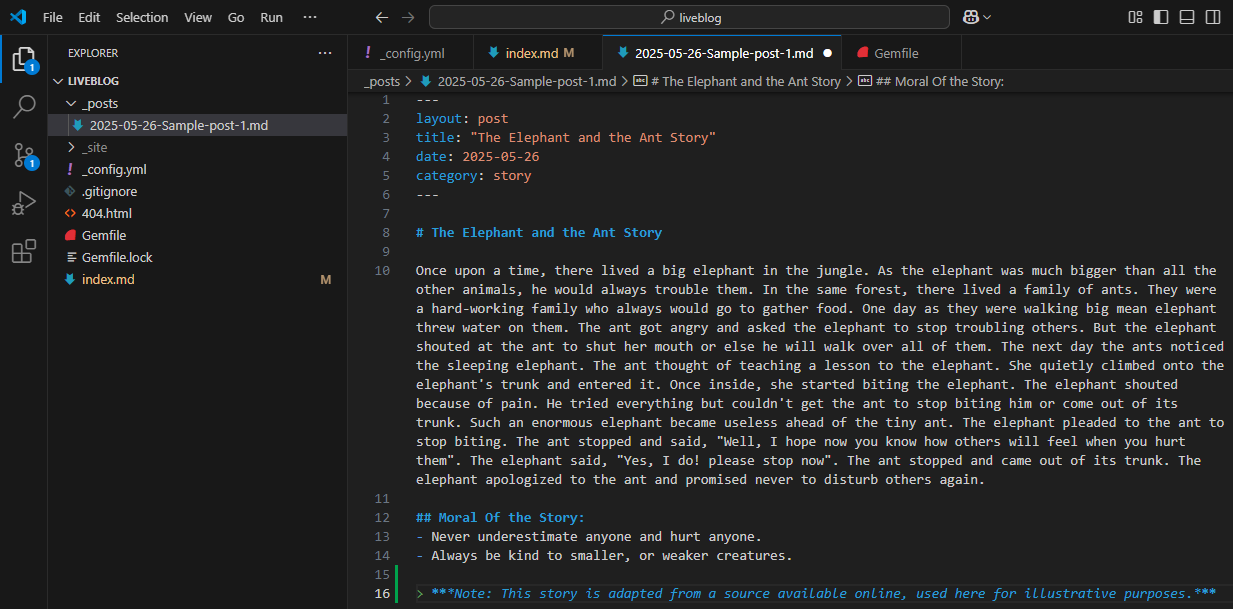
🌐 Step 5: Add a Blog Post
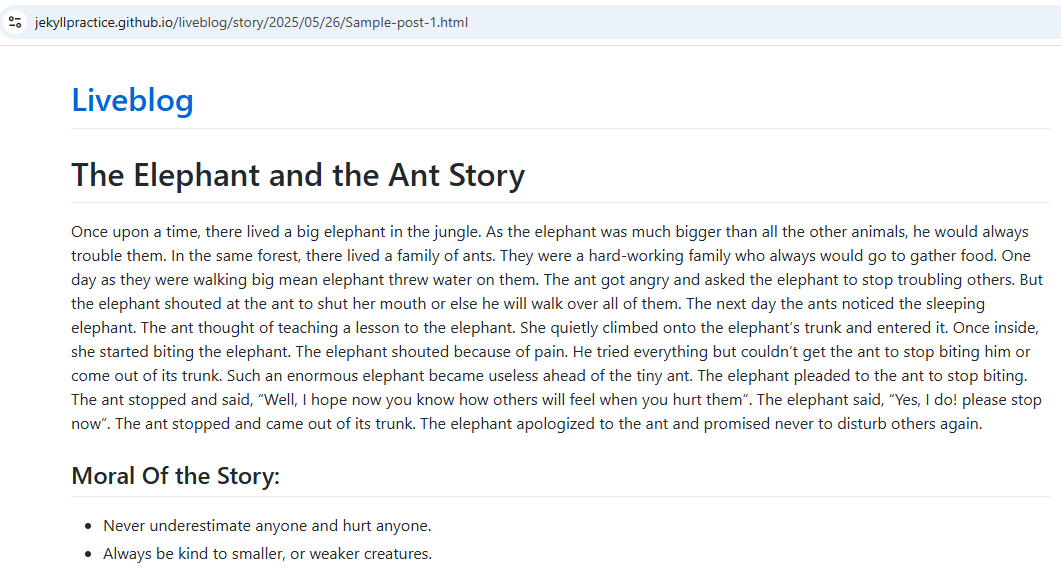
- Inside the _post folder, replace or modify existing blog post with new post (eg. 2025-05-26-Sample-post-1).
- Add the post with proper front matter else the post won’t be displayed.
- Screenshot - New post .md file
Click the image to view full size
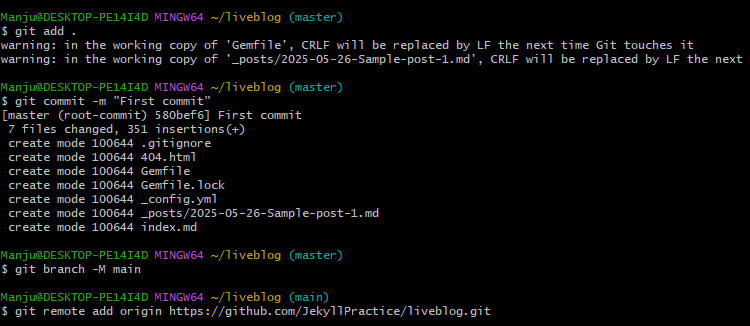
🌐 Step 6: Create GitHub Repository and Connect to Git
- Go to GitHub, create a new repository named liveblog, and leave it empty (no README, .gitignore, or license).
- In your terminal, add all your files, commit the files and add the remote URL to your local Git project.
-
Screenshot - GitHub repo creation

- Screenshot - Git remote connection
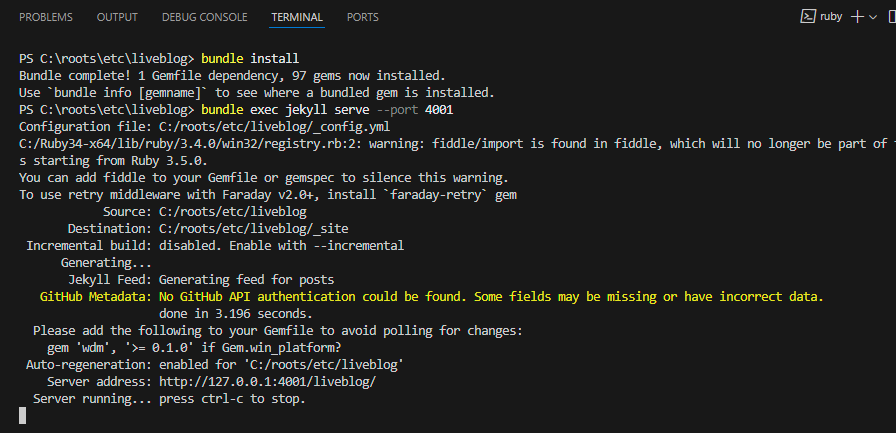
🌐 Step 7: Install Dependencies and Preview Locally
- In VS Code’s integrated terminal (opened inside the liveblog folder), install the required Ruby gems using the command
bundle install. - Then, run the Jekyll server to preview your site
bundle exec jekyll serve.
Tip - To open VS code terminal:
Go to menu: View -> Terminal or use the shortcut Ctrl + ~.
- Vist http://localhost:4000/liveblog in your browser to view yout blog.
Note: If port 4000 is already in use (e.g., for another Jekyll project), you can run the server on an alternate port using
bundle exec jekyll serve --port 4001Then visit http://localhost:4001/liveblog
- Screenshot - VS code terminal showing local preview
Click the image to view full size
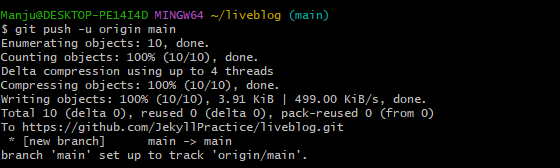
🌐 Step 8: Push te Site to GitHub
-
After confirming that your site works locally, push your code to GitHub using the command
git push -u origin. -
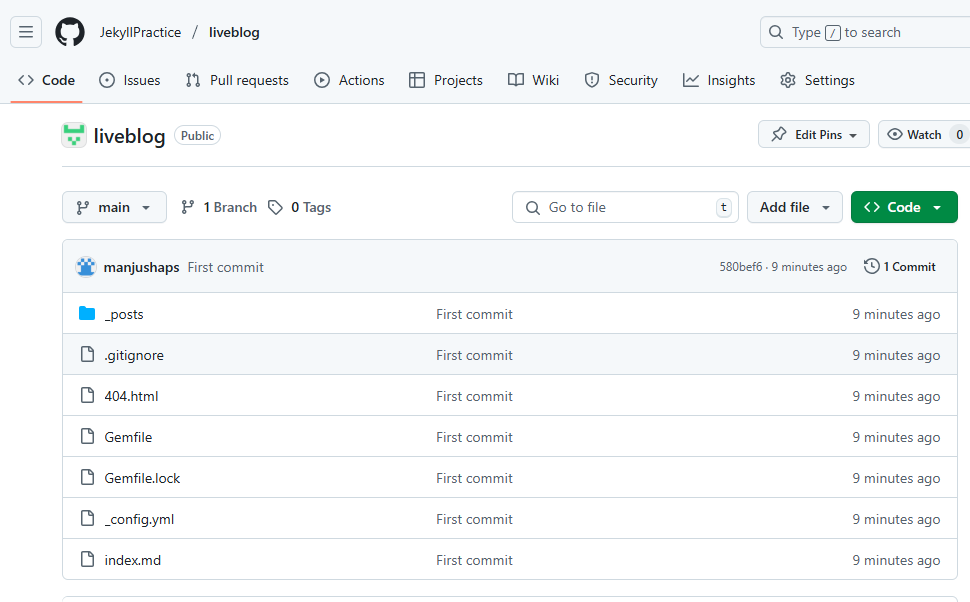
Screenshot - Successful Git push terminal and repository folders.
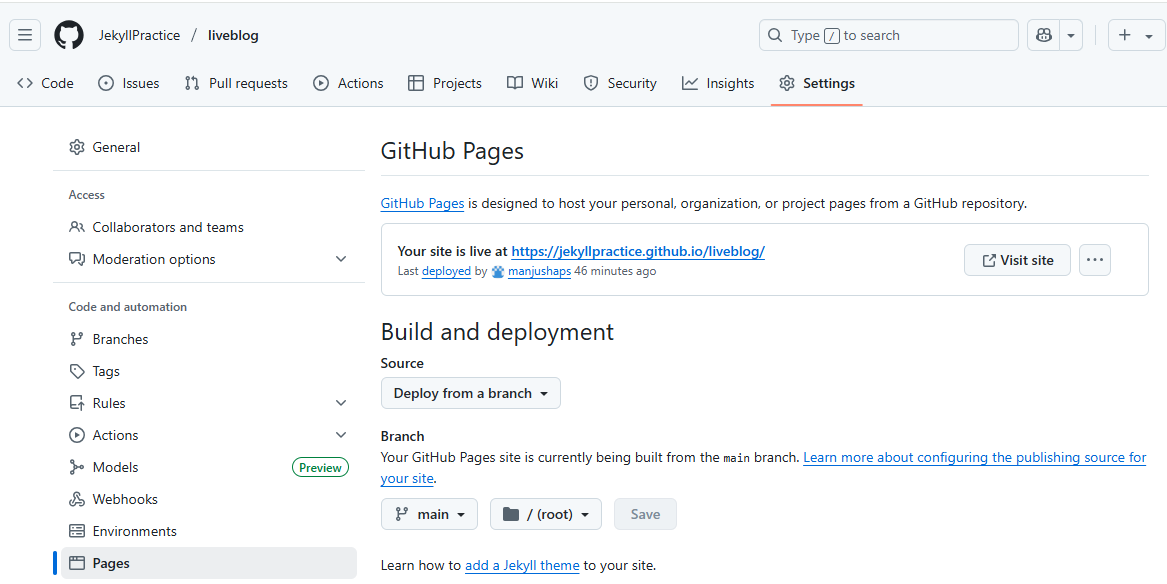
🌐 Step 9: Enable GitHub Pages and Finalize Deployment
- Go to your repository on GitHub:
- Settings → Pages → Build and Deployment
- Choose:
- Source: Deploy from a branch
- Branch: main
- Folder: / (root)
- Save to publish your blog. GitHub will display the live URL (e.g.,https://yourusername.github.io/liveblog).
- Screenshot - GitHub Pages settings page after configuration
Click the image to view full size
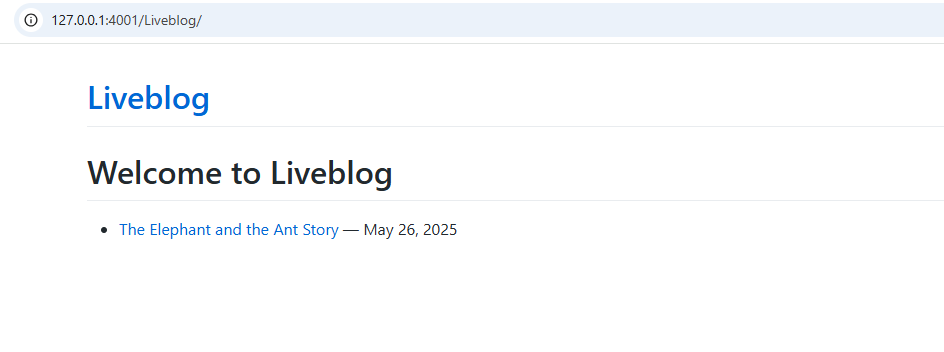
- Screenshot - liveblog homepage and sample post
Note on baseurl:
You only need to set baseurl in _config.yml if your site is hosted in a subdirectory, like https://yourusername.github.io/liveblog
In that case, add:
baseurl: “/liveblog” And use site.baseurl when linking internal pages or assets.
If your site is hosted at the root domain (e.g., with a custom domain or at https://yourusername.github.io/), leave baseurl empty:
baseurl: ““
🎉 Congratulations! You’re Live!
Your Jekyll blog is now live and running on GitHub Pages! You’ve successfully gone from zero to deployed — well done!
💭 Troubleshooting the Errors
| Error Message | Solution |
|---|---|
fatal: ambiguous argument 'HEAD' |
You haven’t committed anything yet. Run git commit -m "Initial commit" before pushing. |
Liquid Exception: No repo name found... |
Add repository: yourusername/liveblog to _config.yml. |
bundle exec jekyll serve fails with theme error |
Ensure theme: minima is set and you’ve run bundle install. |
Could not find gem 'github-pages' or version issues |
Run bundle update or ensure correct Ruby version is used. |
| GitHub Pages doesn’t reflect changes | Ensure you pushed to the correct branch (main) and Pages source is set to main / (root). |
| Posts return 404 | Wrong filenames or not in _posts/.Use YYYY-MM-DD-title.md inside _posts/ |
| Homepage shows no posts | Used layout: default instead of layout: home in index.md. Change to layout: home |
| Broken CSS or links | baseurl not set correctly. Set baseurl: "/your-repo" if site is in subdirectory |
| Works locally but not on GitHub Pages | Pushed _site/ or didn’t let GitHub build it. Don’t push _site/; let GitHub Pages build |
| Port 4000 in use locally | Another Jekyll site is running. Run with --port 4001 or another available port |
🧠 TechNuggetz
⚡Use
bundle exec jekyll serve --livereloadto auto-refresh the site on save.⚡Experiment with themes! Start with jekyll/minima, then explore custom themes or GitHub’s theme chooser.
⚡Use HTML inside markdown files for advanced formatting.
⚡Want to blog in multiple categories? Add tags or categories to your posts’ front matter.
⚡Commit often with meaningful messages, especially before publishing.
🔜 Next on Techn0tz..
Thinking of a pause — a moment of thoughtfulness between lines of code. Stay tuned on 🚀Techn0tz!! for a new reflective series on Marcus Aurelius’ Meditations.